Task
This case prepares the Images column from image_1 for the final CSV.
Short answer
Start Images with image_1, then append non-empty image_2 and image_3 with commas; the first URL remains the featured image.
How to do it in Eofferix
Select the source column or create the output column from the specified source.
image_1→Images.Open the settings of the output column
Images.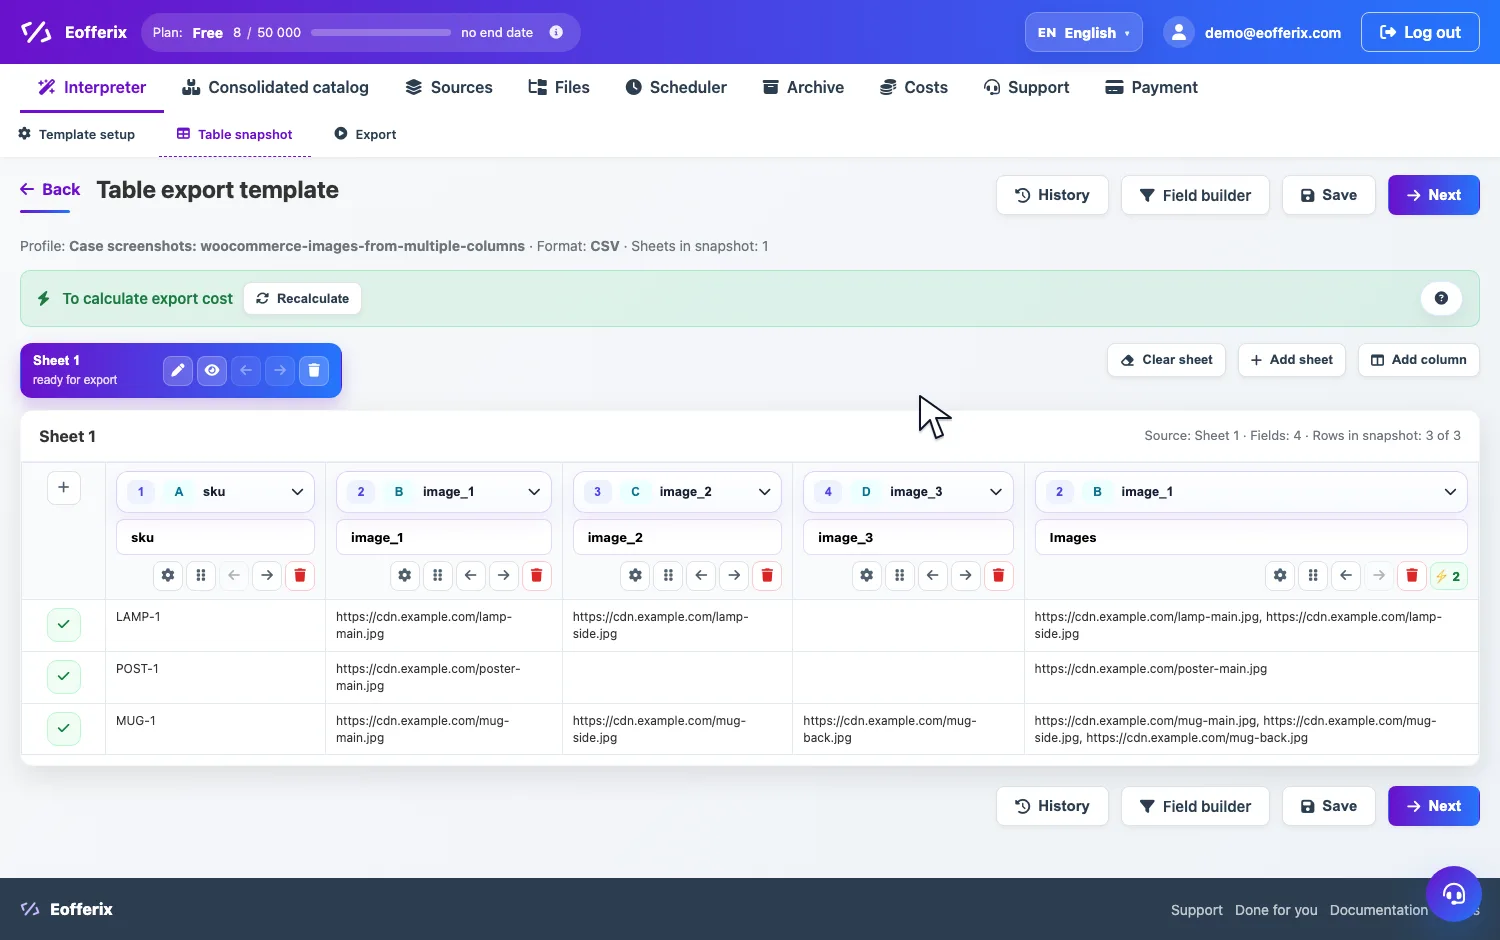
Real animation: opening the output column settings in the table editor. In Transformations, add the rules shown below.

Real screenshot of the Transformations block for this column. Save the settings, go to export, and check the values in the downloaded CSV.
Check target column names and accepted values against the official CSV documentation. WooCommerce CSV.
Before / after
Before
source data| SKU | image_1 | image_2 | image_3 |
|---|---|---|---|
| LAMP-1 | https://cdn.example/lamp-main.jpg | https://cdn.example/lamp-side.jpg | |
| POST-1 | https://cdn.example/poster-main.jpg | ||
| MUG-1 | https://cdn.example/mug-main.jpg | https://cdn.example/mug-side.jpg | https://cdn.example/mug-back.jpg |
After
result| SKU | Images |
|---|---|
| LAMP-1 | https://cdn.example/lamp-main.jpg, https://cdn.example/lamp-side.jpg |
| POST-1 | https://cdn.example/poster-main.jpg |
| MUG-1 | https://cdn.example/mug-main.jpg, https://cdn.example/mug-side.jpg, https://cdn.example/mug-back.jpg |