
Eofferix receives XML/YML files and XML/YML responses. Data can be uploaded once, received automatically from an email attachment, fetched from a direct URL, from an authorized URL, through FTP/FTPS/SFTP, or from a supplier API.
After the source file is uploaded, the service creates an XML snapshot used to configure the result structure. XML/YML can then be transformed into JSON, CSV/XLSX tables, another XML/YML with edited elements, attributes, and values, or imported into applications supported by the service.
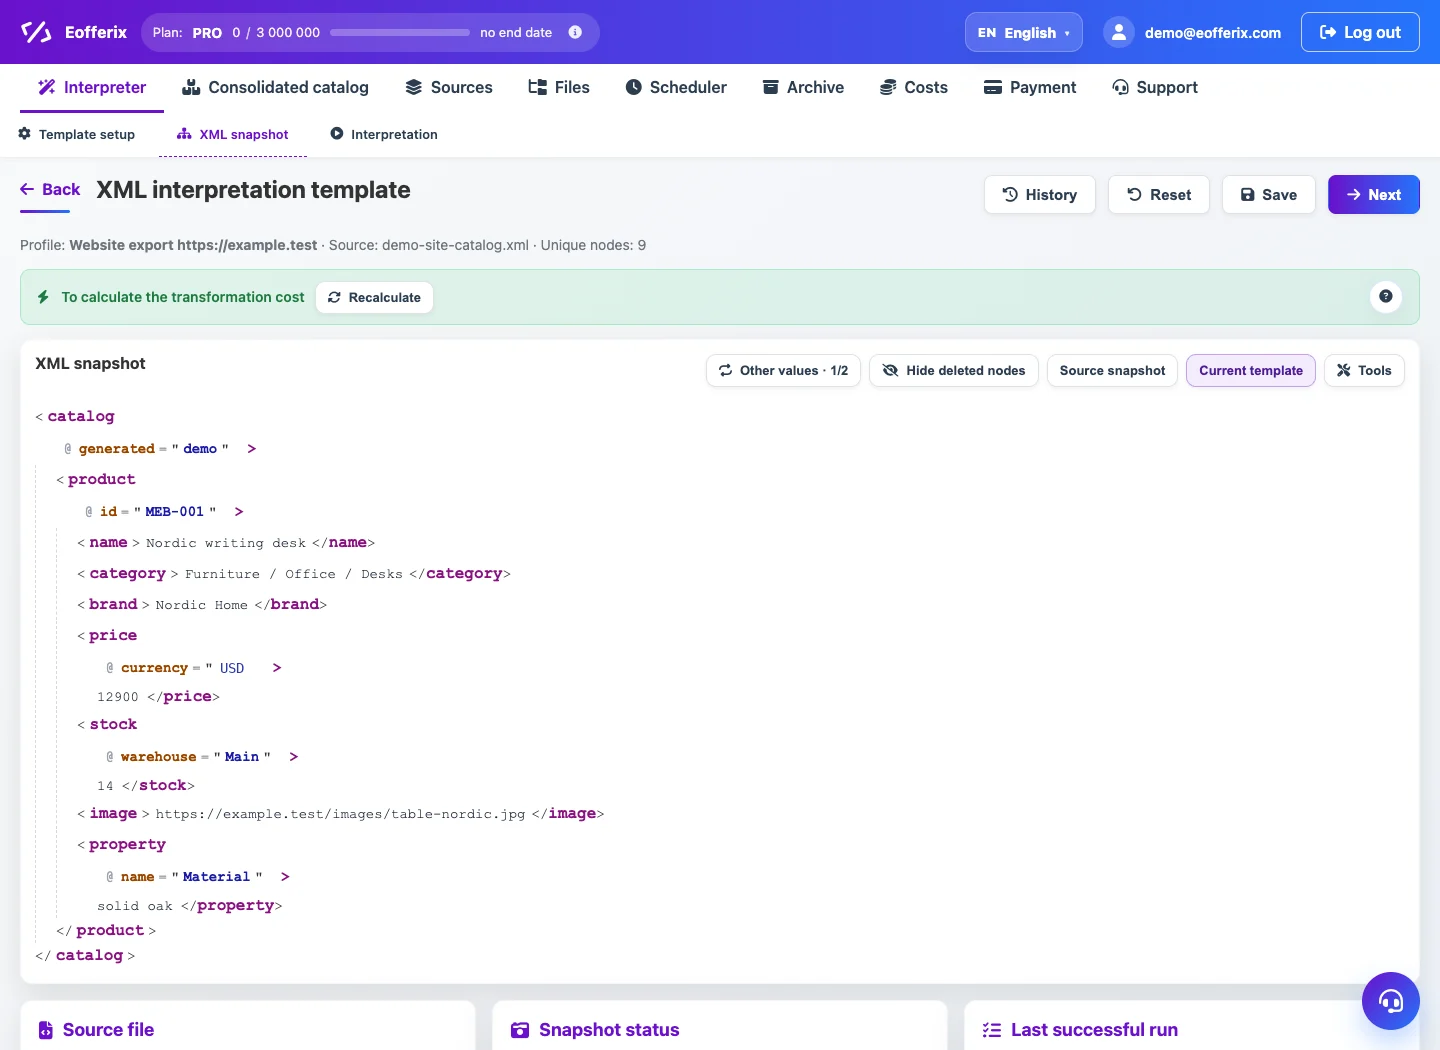
How The XML Snapshot Works
After the source file is uploaded, Eofferix analyzes it and turns it into a short snapshot with unique elements, attributes, and sample values. If the document contains a thousand products, the snapshot shows one typical repeated element instead of a thousand identical branches.
In the snapshot, you can rename elements and attributes, change the structure, remove unnecessary branches, create new nodes, and configure transformation rules. YML is handled the same way: the service reads the catalog, categories, offers, prices, stock, and parameters as an XML structure.
What Can Be Transformed
- Rename elements and attributes. In XML itself, an attribute is written without
@:<offer id="A-100">. In Eofferix paths and lists, it is shown as@id; it can be renamed to produce<product external_id="A-100">, while<name>can become<title>. - Filter records. Keep only offers where
@available = true, products with stock above zero, or elements from a required category. - Change nesting. Move a price from an attribute into a separate element, collect
<param>values into attributes, and place images into the required container. - Calculate values. Calculate markup price, discount percentage, category path, import date, or a value based on a neighboring XML node.
- Transform images. Convert images to
jpg/png/webp, resize them, or apply a watermark. - Import into an application. Map XML elements and attributes to catalog, CMS, CRM, marketplace, or another supported destination.
Transformation Examples
The transformation tool can significantly reshape the final XML/YML: filter unnecessary elements, rename nodes and attributes, build a new structure, calculate values by rules, and prepare the result for a website, marketplace, PIM, or internal system.
What The Price Example Does
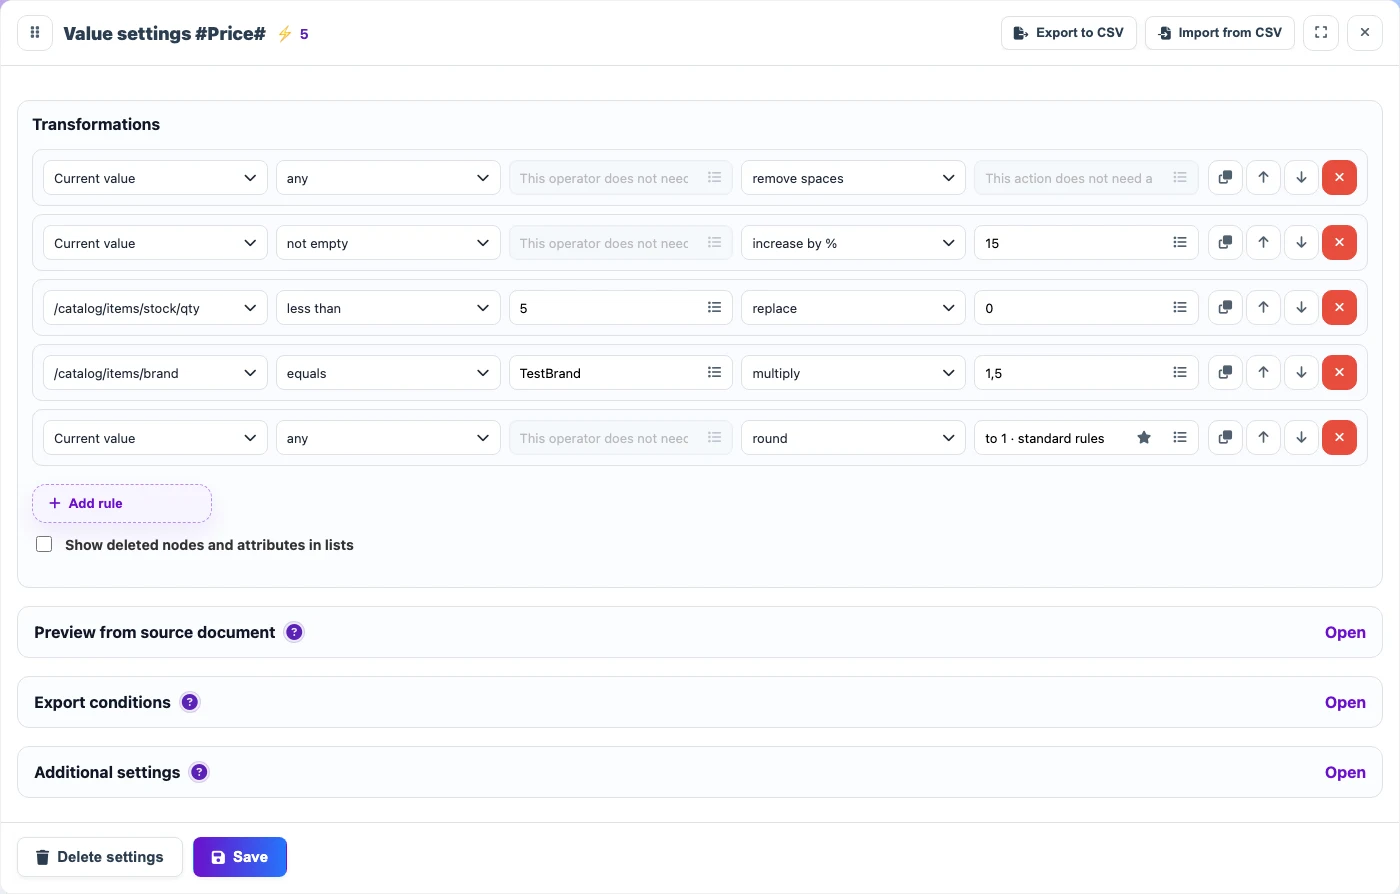
The rules below are split into steps. Each screenshot shows only the rule row responsible for the current step.
1. First, remove spaces from the price value. This helps when a supplier sends the price as text, for example 12 990, inside an XML node.

2. If the price is not empty, the service increases it by 15%. This adds markup without changing the source XML.

3. Next, the rule checks another document node: /catalog/items/stock/qty. If stock is below 5, the price is replaced with 0.

4. Another rule uses the /catalog/items/brand node: for TestBrand, the price is additionally multiplied by 1.5.

5. Finally, the result is rounded to one decimal place using standard rules.

Simple Example: Rename Elements And Keep Active Products
In this example, we take repeated catalog.items.item elements, keep only active products, and adapt element names to the target export format.
<catalog>
  <items>
    <item id="A-100" active="true">
      <name>Nordic armchair</name>
      <brand>Nordic Home</brand>
      <prices>
        <base currency="USD">129.90</base>
        <discount currency="USD">119.90</discount>
      </prices>
    </item>
  </items>
</catalog><catalog>
<products>
<product external_id="A-100">
<title>Nordic armchair</title>
<brand>Nordic Home</brand>
<price currency="USD">119.90</price>
<old_price currency="USD">129.90</old_price>
</product>
</products>
</catalog>Rules:
- The source XML has a product with
id = A-100. Other products follow the same structure, while the snapshot shows one representative item from the repeatedcatalog.items.itembranch. Click thetruevalue of theactiveattribute and in Export conditions choose Condition for whole element. This can export only elements withtrue, or exclude elements withfalse.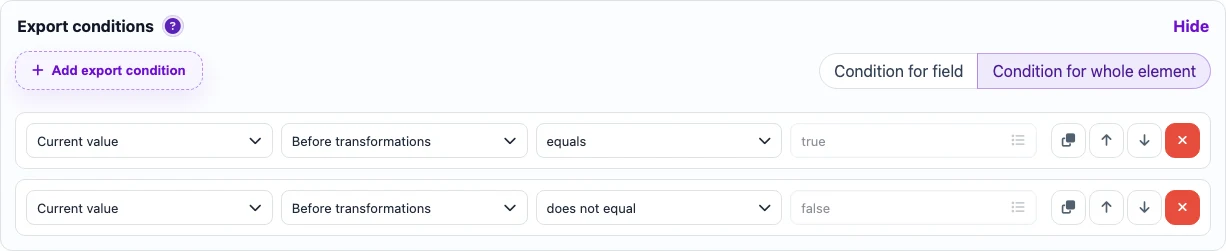
The condition is applied to the whole element: the product is exported when active equals true; the second rule can be used as the inverse false check. - Rename the
idattribute toexternal_id: click the attribute or node name and enter the new name.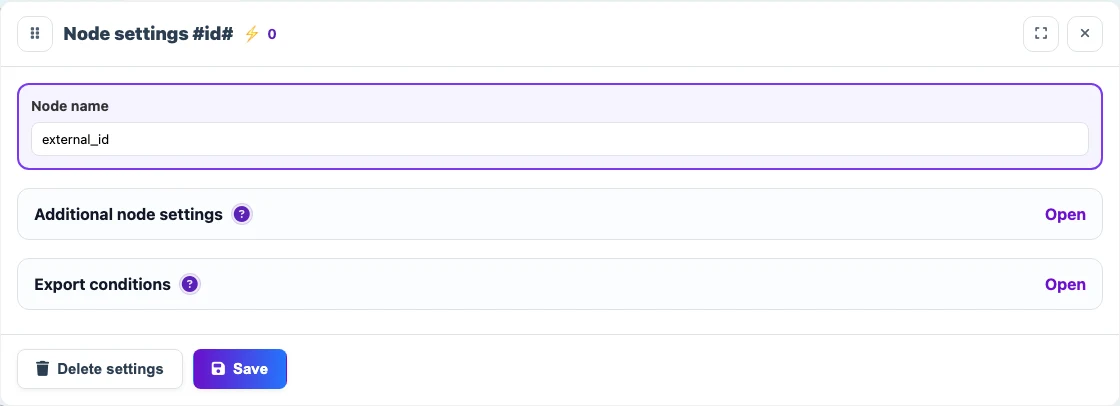
Node settings: external_id is entered in the Node name field. - Rename the
nameelement totitlein the same way. - There are two working price scenarios. If the
pricescontainer is fine, renamediscounttopriceandbasetoold_price. Ifpriceandold_pricemust be placed at product level, create new nodes next totitleand fill them from/catalog/items/item/prices/discountand/catalog/items/item/prices/base. You can also change a node structure directly: hover over the node name and, in the menu that appears, click the left arrow to move the node up to the level of the other element nodes.
New Nodes
A new XML node is needed when the result must contain a field that is not present in the source XML/YML, or when the source data needs to be rearranged.
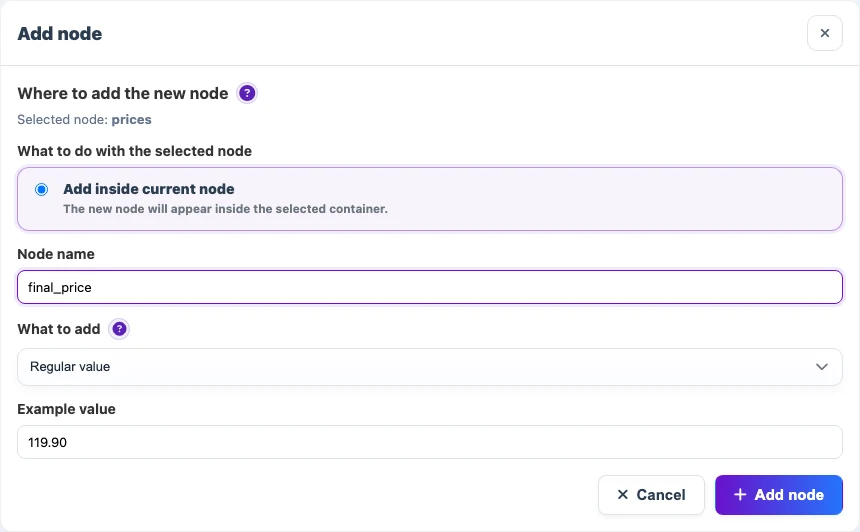
A node can be filled with:
- a value from another part of the source file. For example, if XML contains
<name>Test product</name>,<article>111-111</article>, and<brand>TestBrand</brand>, they can be combined into a new node:<FullName>Test product 111-111 TestBrand</FullName>; - a system value, such as the run date or source name;
- an expression, such as joining the category path or calculating the discount percentage;
- it can also be made a variable.
Variables: Why They Matter
A variable stores an intermediate result. It is useful when one value must be used in several fields or conditions.
Important: variables do not appear in the final export. They only help other transformations: you can store an intermediate result and use it later in rules, conditions, or calculations.
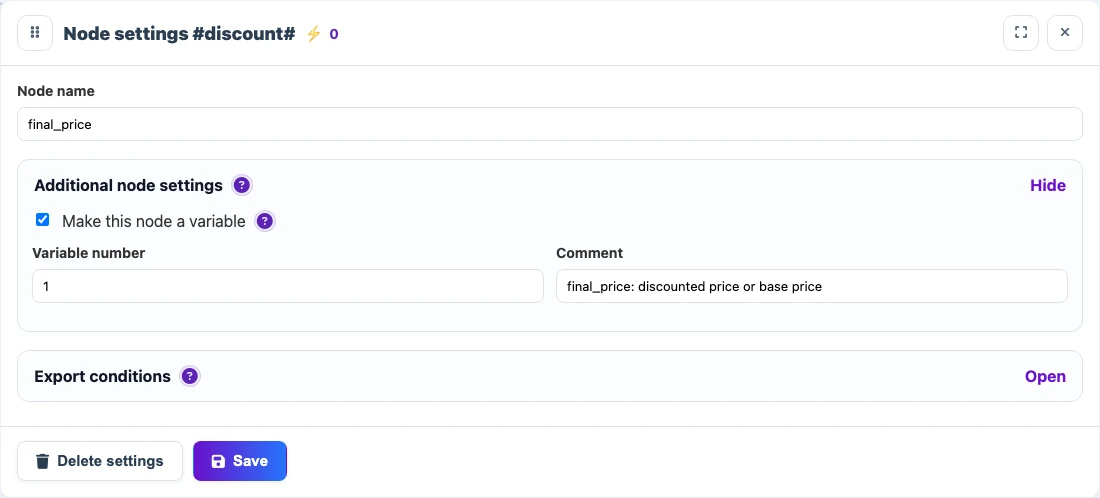
For example, the final_price variable is calculated once:
final_priceis written to<price>;<old_price>is filled with the base price whenfinal_priceis lower than the base price;- the export condition checks that
final_priceis greater than zero; - another rule uses
final_priceto calculate the discount.
This keeps rules shorter, and the price does not diverge across different parts of the result because of repeated manual calculation.