
The connection defines which site the import writes to. If a profile was copied, moved to another site, or the administrator password changed, run the connection check again.
- the profile is linked to the intended site;
- import settings open only after successful authorization;
- one root section is selected for new categories;
- after saving and reopening the profile, the same section is shown.
Where To Find It
Open Interpreter → profile → Template → UMI.CMS catalog import settings.
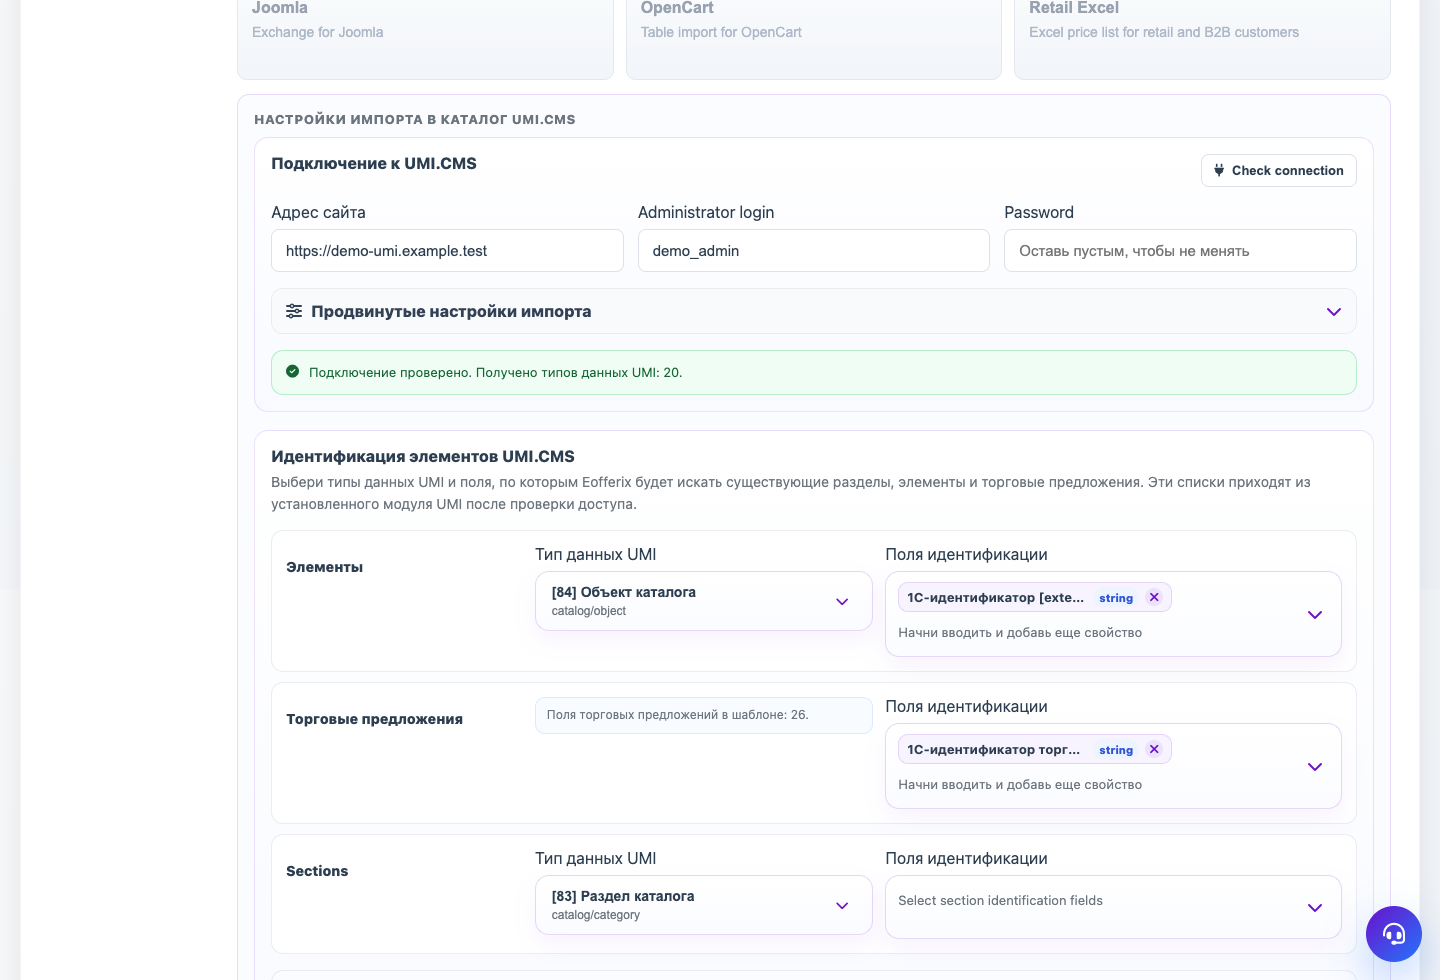
The connection links an Eofferix profile to one UMI.CMS site. Until the connection is checked, import settings should stay hidden because the service does not know the site data types and fields.
Access Check
Enter the site address without admin pages or parameters, add the administrator login and password, then click Check connection. After a successful check, the password does not have to be entered again on every save.
When The Site Changes
If you change the site address, login, or password, run the check again. Do not configure data types, fields, or root section until the new authorization succeeds.
Data Types
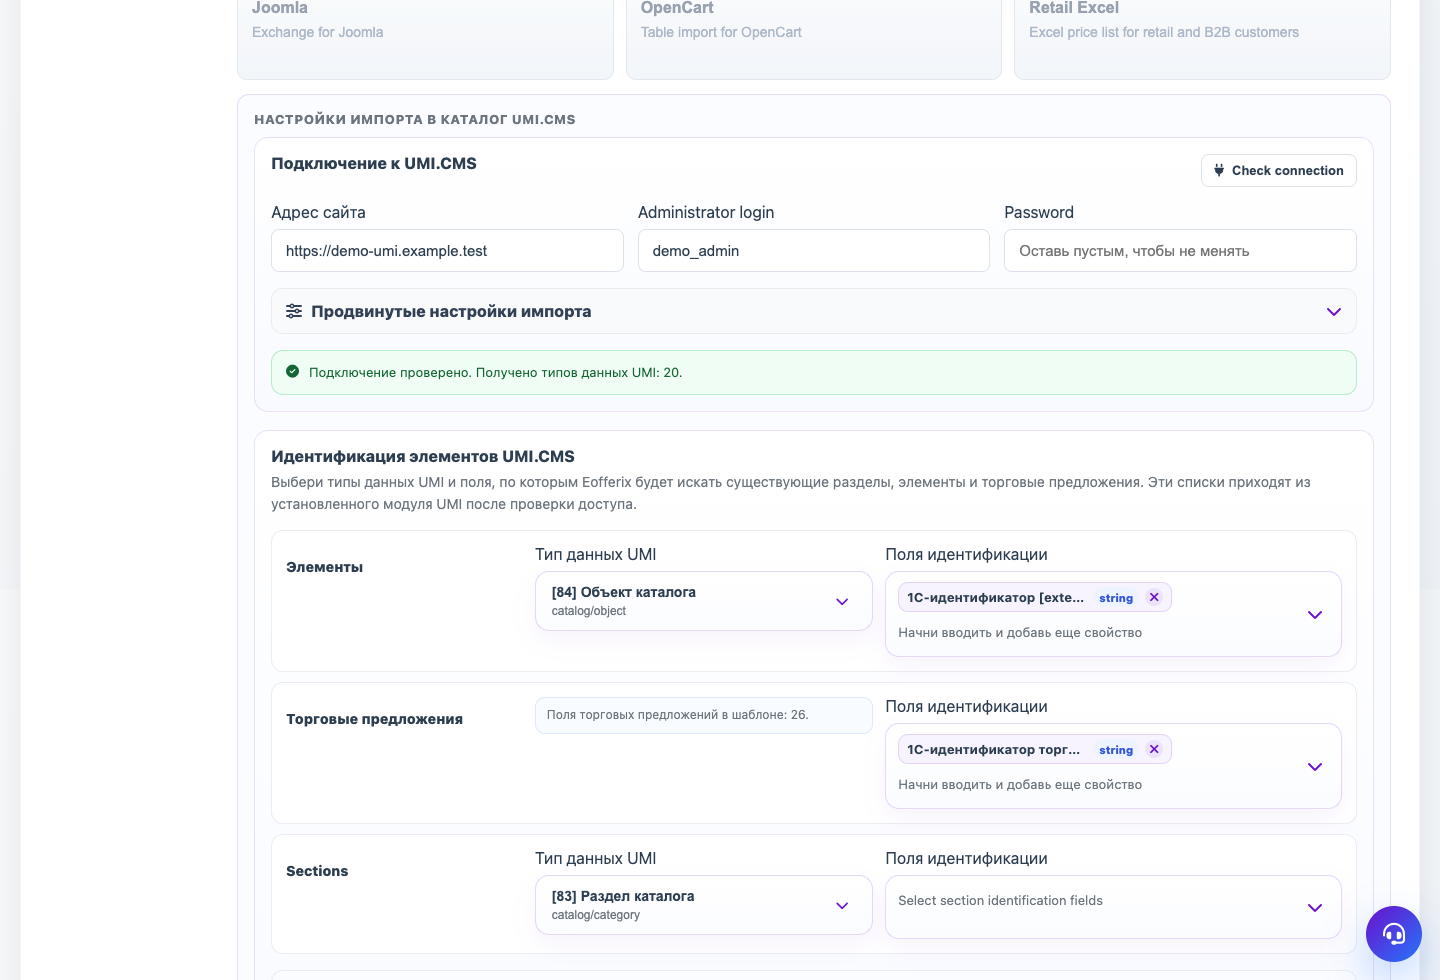
After connection, choose product and section data types. Standard UMI.CMS catalogs usually use catalog object and catalog section, but a site can also use child data types.
Root Section
The root section controls where new source sections are created. After a connection check, the profile must show one selected root section; if the interface shows more than one value, do not save the profile and run the connection check again.
Step-by-step Setup
- Enter the site address without admin path or URL parameters.
- Enter the UMI.CMS administrator login. Enter the password on first connection or when access changed.
- Click Check connection and wait for the green message.
- Only then choose product data type, section data type, and matching fields.
- Choose one root section where new source sections will be created.
- Save the profile and open it again: the same single root section should be shown.
How To Check The Result
- The message shows how many UMI.CMS data types were received.
- Product, offer, and section matching blocks are selectable.
- The root section is shown only once.
- Leaving the password field empty on later saves does not break a checked connection.
Common Mistakes
- Assuming a hidden password still works after changing the site.
- Configuring import fields before running the new connection check.
- Keeping duplicate root section selectors after copying a profile.
- Choosing a child product type without checking that it contains the needed fields.
What To Do Next
When connection works, configure matching fields to avoid duplicates.