
Task
Part of the product data is stored in XML attributes, for example id and code. The result should be a table file where these attributes are regular CSV or XLSX columns.
Short answer
Add the XML file as a source in an interpreter profile and choose CSV or XLSX as the result format. In the table editor, check the id, code, and name columns.
How to Do It in Eofferix
- In Interpreter, create or open a profile. Add the XML file as the data source and choose
CSVorXLSXas the export format. - Click Continue to open the table editor. XML attributes should appear as separate result columns.
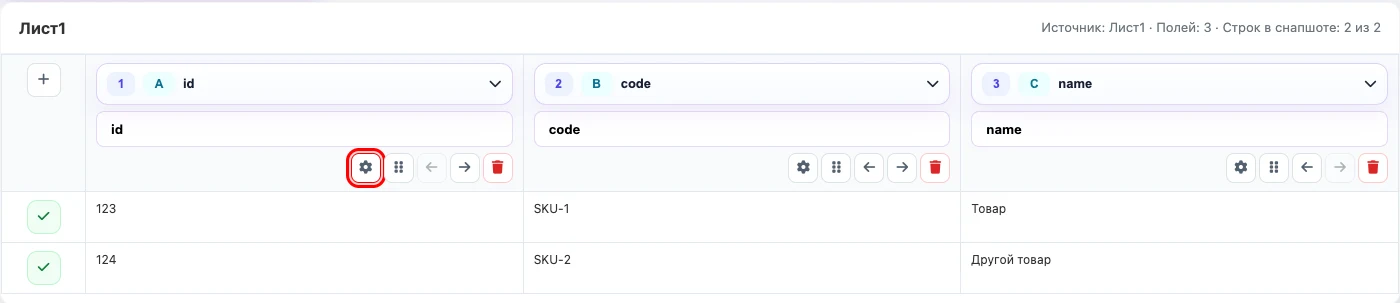
The table editor shows XML attributes as result columns: id, code, and name. The settings icon for id is highlighted. - If a column is not mapped automatically, open its settings and choose the required source: for
id, the XML attributeid; forname, the XML nodename.
Before / After
Before
XML<catalog><offer id="1001" code="A-10"><name>Office chair</name></offer></catalog>After
CSV / XLSX| id | code | name |
|---|---|---|
| 1001 | A-10 | Office chair |