XML Snapshot

How to review the compact result preview, inspect sample values, and configure data processing before running a transformation.

The XML snapshot shows how Eofferix has represented the XML structure of the uploaded content. Here you can select the value you need and configure how it is processed.

The snapshot shows unique nodes and data samples, not the entire source content. The final file is created after you run the transformation.

The illustrations show product data as an example, but the service works with any list-based data.
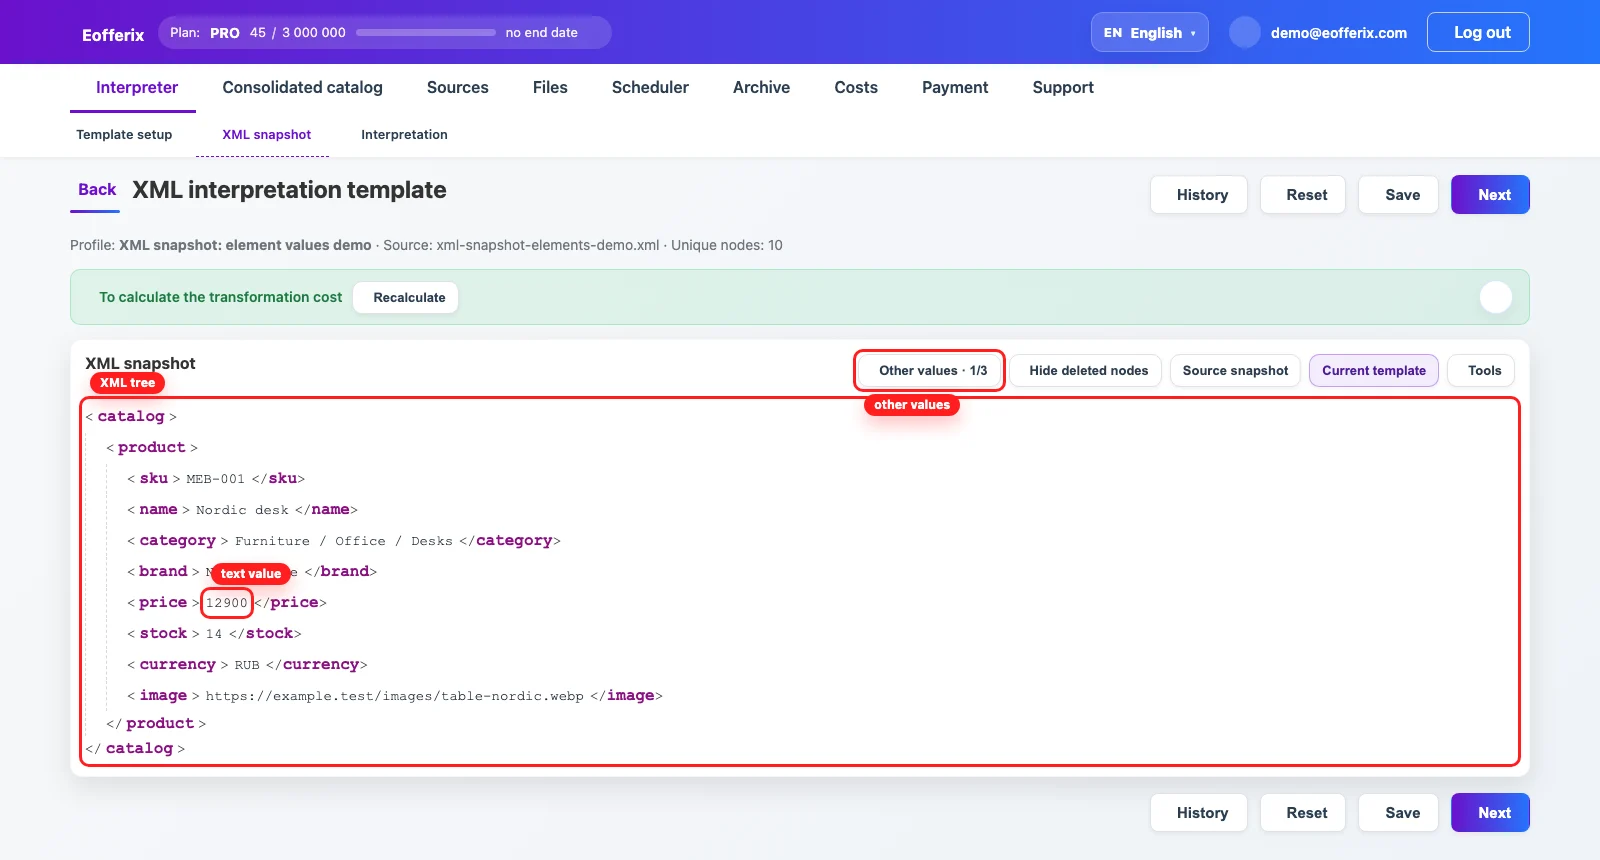
Eofferix XML snapshot with a working tree, view modes, and the Other values button
Overview screen: the snapshot working tree, sample switching, and view modes.

What the screen shows

The tree in the center is the profile’s working view of the data. You do not need to study XML for a routine check: compare the displayed structure with the source material and with what you expect after processing.

  • Source snapshot shows the tree that Eofferix prepared from the source before your changes.
  • Current template shows the version with the settings made in the profile. Structural changes are available in this mode.
  • Other values switches between available samples. The button appears only when the service has found more than one sample.
  • The snapshot shows samples, not the entire source content. If a value is empty in one sample, it may be populated in another.

Configure an individual value


Click the value you want to configure directly in the tree. Its settings window opens. Every rule added here applies only to the selected value.

Animation showing how to open settings for a selected value in the Eofferix XML snapshot
Click a value in the tree to open the settings that apply to it.
  • Transformations prepare a value before it is written to the result by cleaning, replacing, combining, or reformatting it.
  • Export conditions determine when the selected value is included in the result.
  • Preview from source document displays original and processed samples side by side. Refresh the preview after changing rules.
  • Click Save in the settings window when you have finished working with the selected value.

For detailed setup options, see Value Transformations and How Field Export Conditions Work.