
The Eofferix module lets a 1C-Bitrix site receive the catalog prepared in Eofferix: sections, products, offers, images, files, and properties.
For the first setup, start with the full guide: exporting a catalog to 1C-Bitrix.
What You Need
- Access to the 1C-Bitrix admin panel as the main administrator.
- Access to the site files through the hosting file manager or with help from your site specialist.
- The
eofferix-bitrix-install.ziparchive.
Install With The Ready Installer
- Sign in to the 1C-Bitrix admin panel in the same browser.
- Download and unpack
eofferix-bitrix-install.zip. - Upload the
eofferix-bitrix-installfolder to the main site folder, next to thebitrixfolder. - Open
https://site.com/eofferix-bitrix-install/install.php. - Wait for the success message.
- Delete the
eofferix-bitrix-installfolder from the site.
Connect In Eofferix
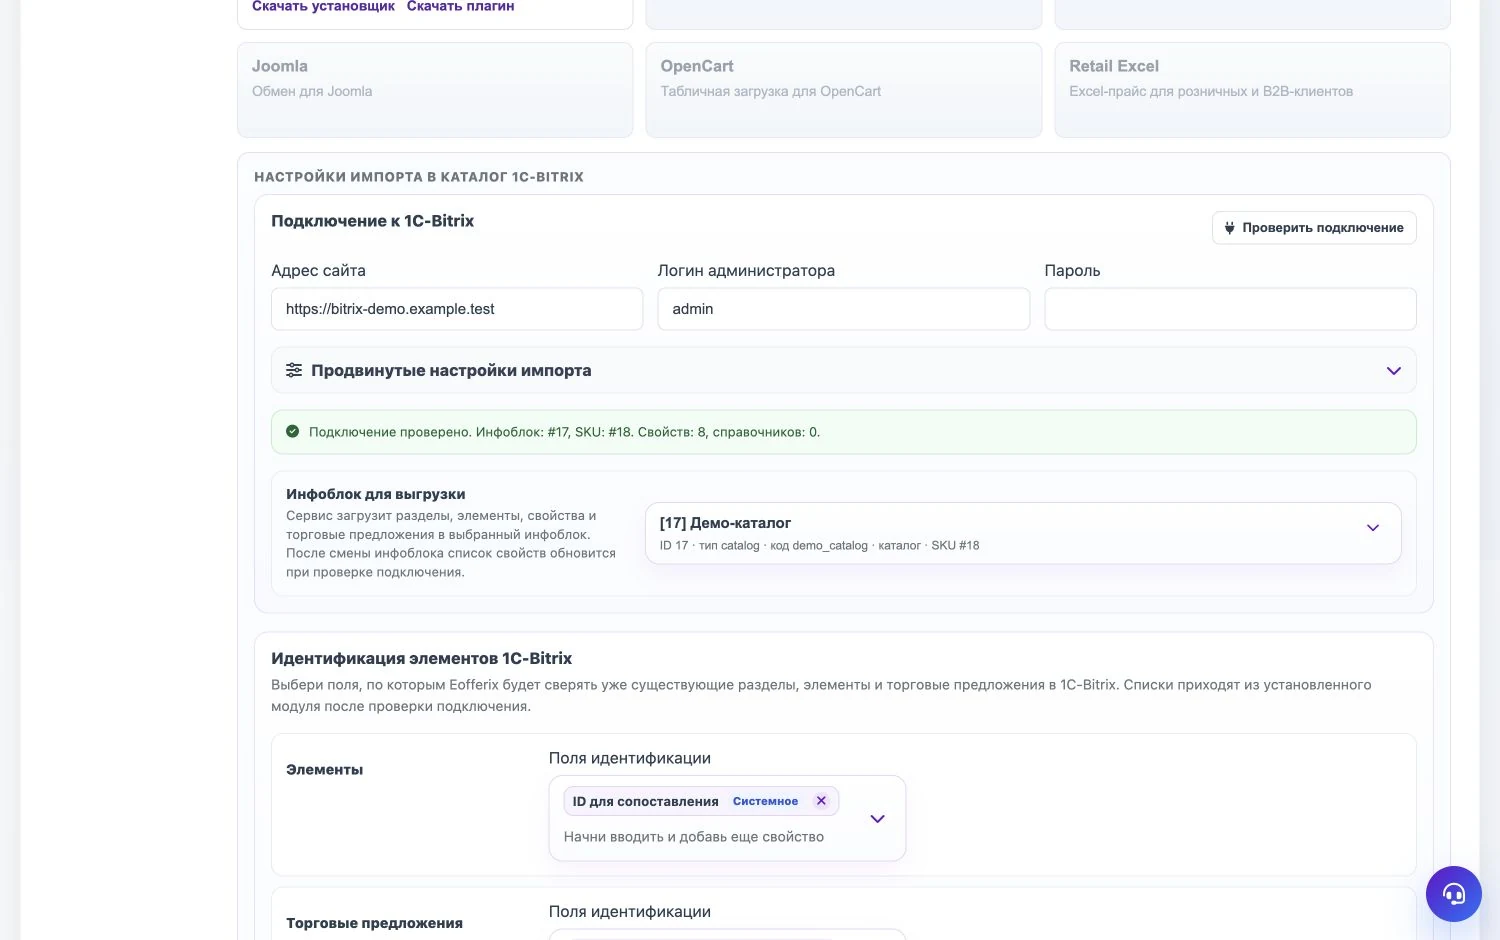
Open the export profile, choose 1C-Bitrix, enter the site address and administrator login, then click Check connection. After a successful check, choose the Bitrix catalog.
What To Check
- the installer folder has been deleted;
- the site address has no extra pages or parameters;
- the correct Bitrix catalog is selected;
- the connection check shows a green success message.